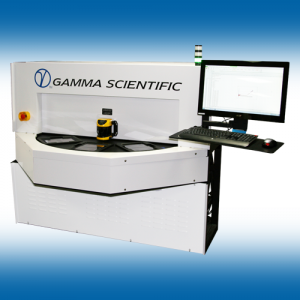
This fully automatic gonio-reflectance measurement system automatically captures complete spectral & colorimetric properties at 0° and 45° angle of incidence simultaneously, for coated glass, polished substrates or diffuse surfaces without requiring second-surface masking. Substrates as thin as 400µm can be tested with typical scan times of 300ms per measurement point.
Based on high precision spectroradiometric instrumentation, proprietary measurement techniques and expertise in low-light measurement technology developed by Gamma Scientific, the product range features industry-leading accuracy, repeatability and throughput, including both refractive index determination and thin film coating thickness.
Applications
- Anti-reflectance coating characterization
- Flat-panel display glass testing
- Touchscreen display glass testing
- Optical filter / lens testing
- Pyrolytic glass coating test & characterization
- Characterization of flat panel displays, photovoltaic coatings, low-E architectural coatings, paint samples and diffuse plastics
Highly Accurate & Repeatable Reflection Measurements
- Nondestructively capture complete spectral and colorimetric properties with scan times as short as 200 msec per measurement point
- Isolated first-surface measurement of thin glass substrates down to 500 µm in thickness without requiring second-surface masking
- Measure total reflectance or isolate internal optical interfaces
- Test capability for diffuse or specular surfaces
- Programmable, multi-location measurement, pass/fail criteria settings and binning capabilities
- Configuration options including handheld, semi-automatic and fully automatic rotary systems with robotic loading
In addition to our exceptional technical and functional capabilities, Gamma Scientific is ISO/IEC 17025 accredited by NVLAP (NVLAP lab code 200823-0).
Optical Specifications | ||
191 Optical Head (Optional Geometries of 0° and 20°) | 10 Degree Angle of Incidence | 45 Degree Angle of Incidence |
Measurement Type | First surface specular reflection | First surface specular reflection |
Sample Types | Glass | Glass |
Illumination Angle | 10° | 45° |
Viewing Angle | 10° | 45° |
Maximum Sample Thickness (first-surface reflectance only) | 0.5 mm (transparent samples) | 0.25 mm (transparent samples) |
Maximum Sample Thickness | 6 mm | 6 mm |
Maximum Sample Size | Customer defined. One machine can support up to 3 different panel sizes. | |
Spectral Range | 360 to 830 nm | 360 to 830 nm |
Illumination Spot Size (sample area) | 1 mm x 10 µm | 1 mm x 10 µm |
Measurement Speed (typical) | < 1500 msec | < 1500 msec |
Calibration Reference Standard | Integral BK-7 polished glass | Integral BK-7 polished glass |
Spectral Reflectance | ± 0.5% | ± 0.5% |
Tristimulus (CIE 1931 X,Y,Z) | ± 0.05 | ± 0.10 |
Chromaticity (CIE 1931 x,y) | ± 0.005 | ± 0.005 |
LAB Color (CIE 1976 L*, a*, b*) | L ± 0.8, a* ± 0.6, b* ± 0.6 | L ± 0.8, a* ± 0.6, b* ± 0.6 |
Average Reflectance | ± 0.2 | ± 0.2 |
Rotary System Specifications | ||
191 Optical Head | 191F-1045 Dual Angle Optics | |
Measurement Locations per Panel | 3 measurement locations standard. Configurable up to 5 locations. Configurable for 10 and 45° measurement at any location. | |
Glass stations | 8 glass stations; 3 for loading / unloading and 5 for measurement optics. | |
Cycle Time | < 6 seconds per panel assuming 3 second loading and unloading time. | |
Spectral Data | Reflectance as a function of wavelength | |
Colorimetric Data | Tristimulus 1931 X,Y,Z Tristimulus 1964 X,Y,Z CIE 1931 x,y CIE 1976 L*, a*, b* CIE 1976 L*, u*, v* | |
System Dimensions | 1.75 meters H x 1.6 meters W x 1.6 meters D Weight 1000 kg | |
Operating Ranges | Ambient Temperature 0 to 35°C Relative Humidity < 90% non-condensing | |
Specifications are subject to change without notice. | ||

